Have you ever eaten home made bacon? It’s easy and everything you need to know is right here.


What you will need.
– A pork belly or piece.
– You will need some meat cure. In Canada you can order Super Cure from the Yes Group Inc. or your local butcher shop may carry it. In Chatham I can get it at Schinkels. It is cheap and $10 worth will last years.
– Digital scale to at least one decimal point, two would be better.
– Large Zip lock freezer bags.
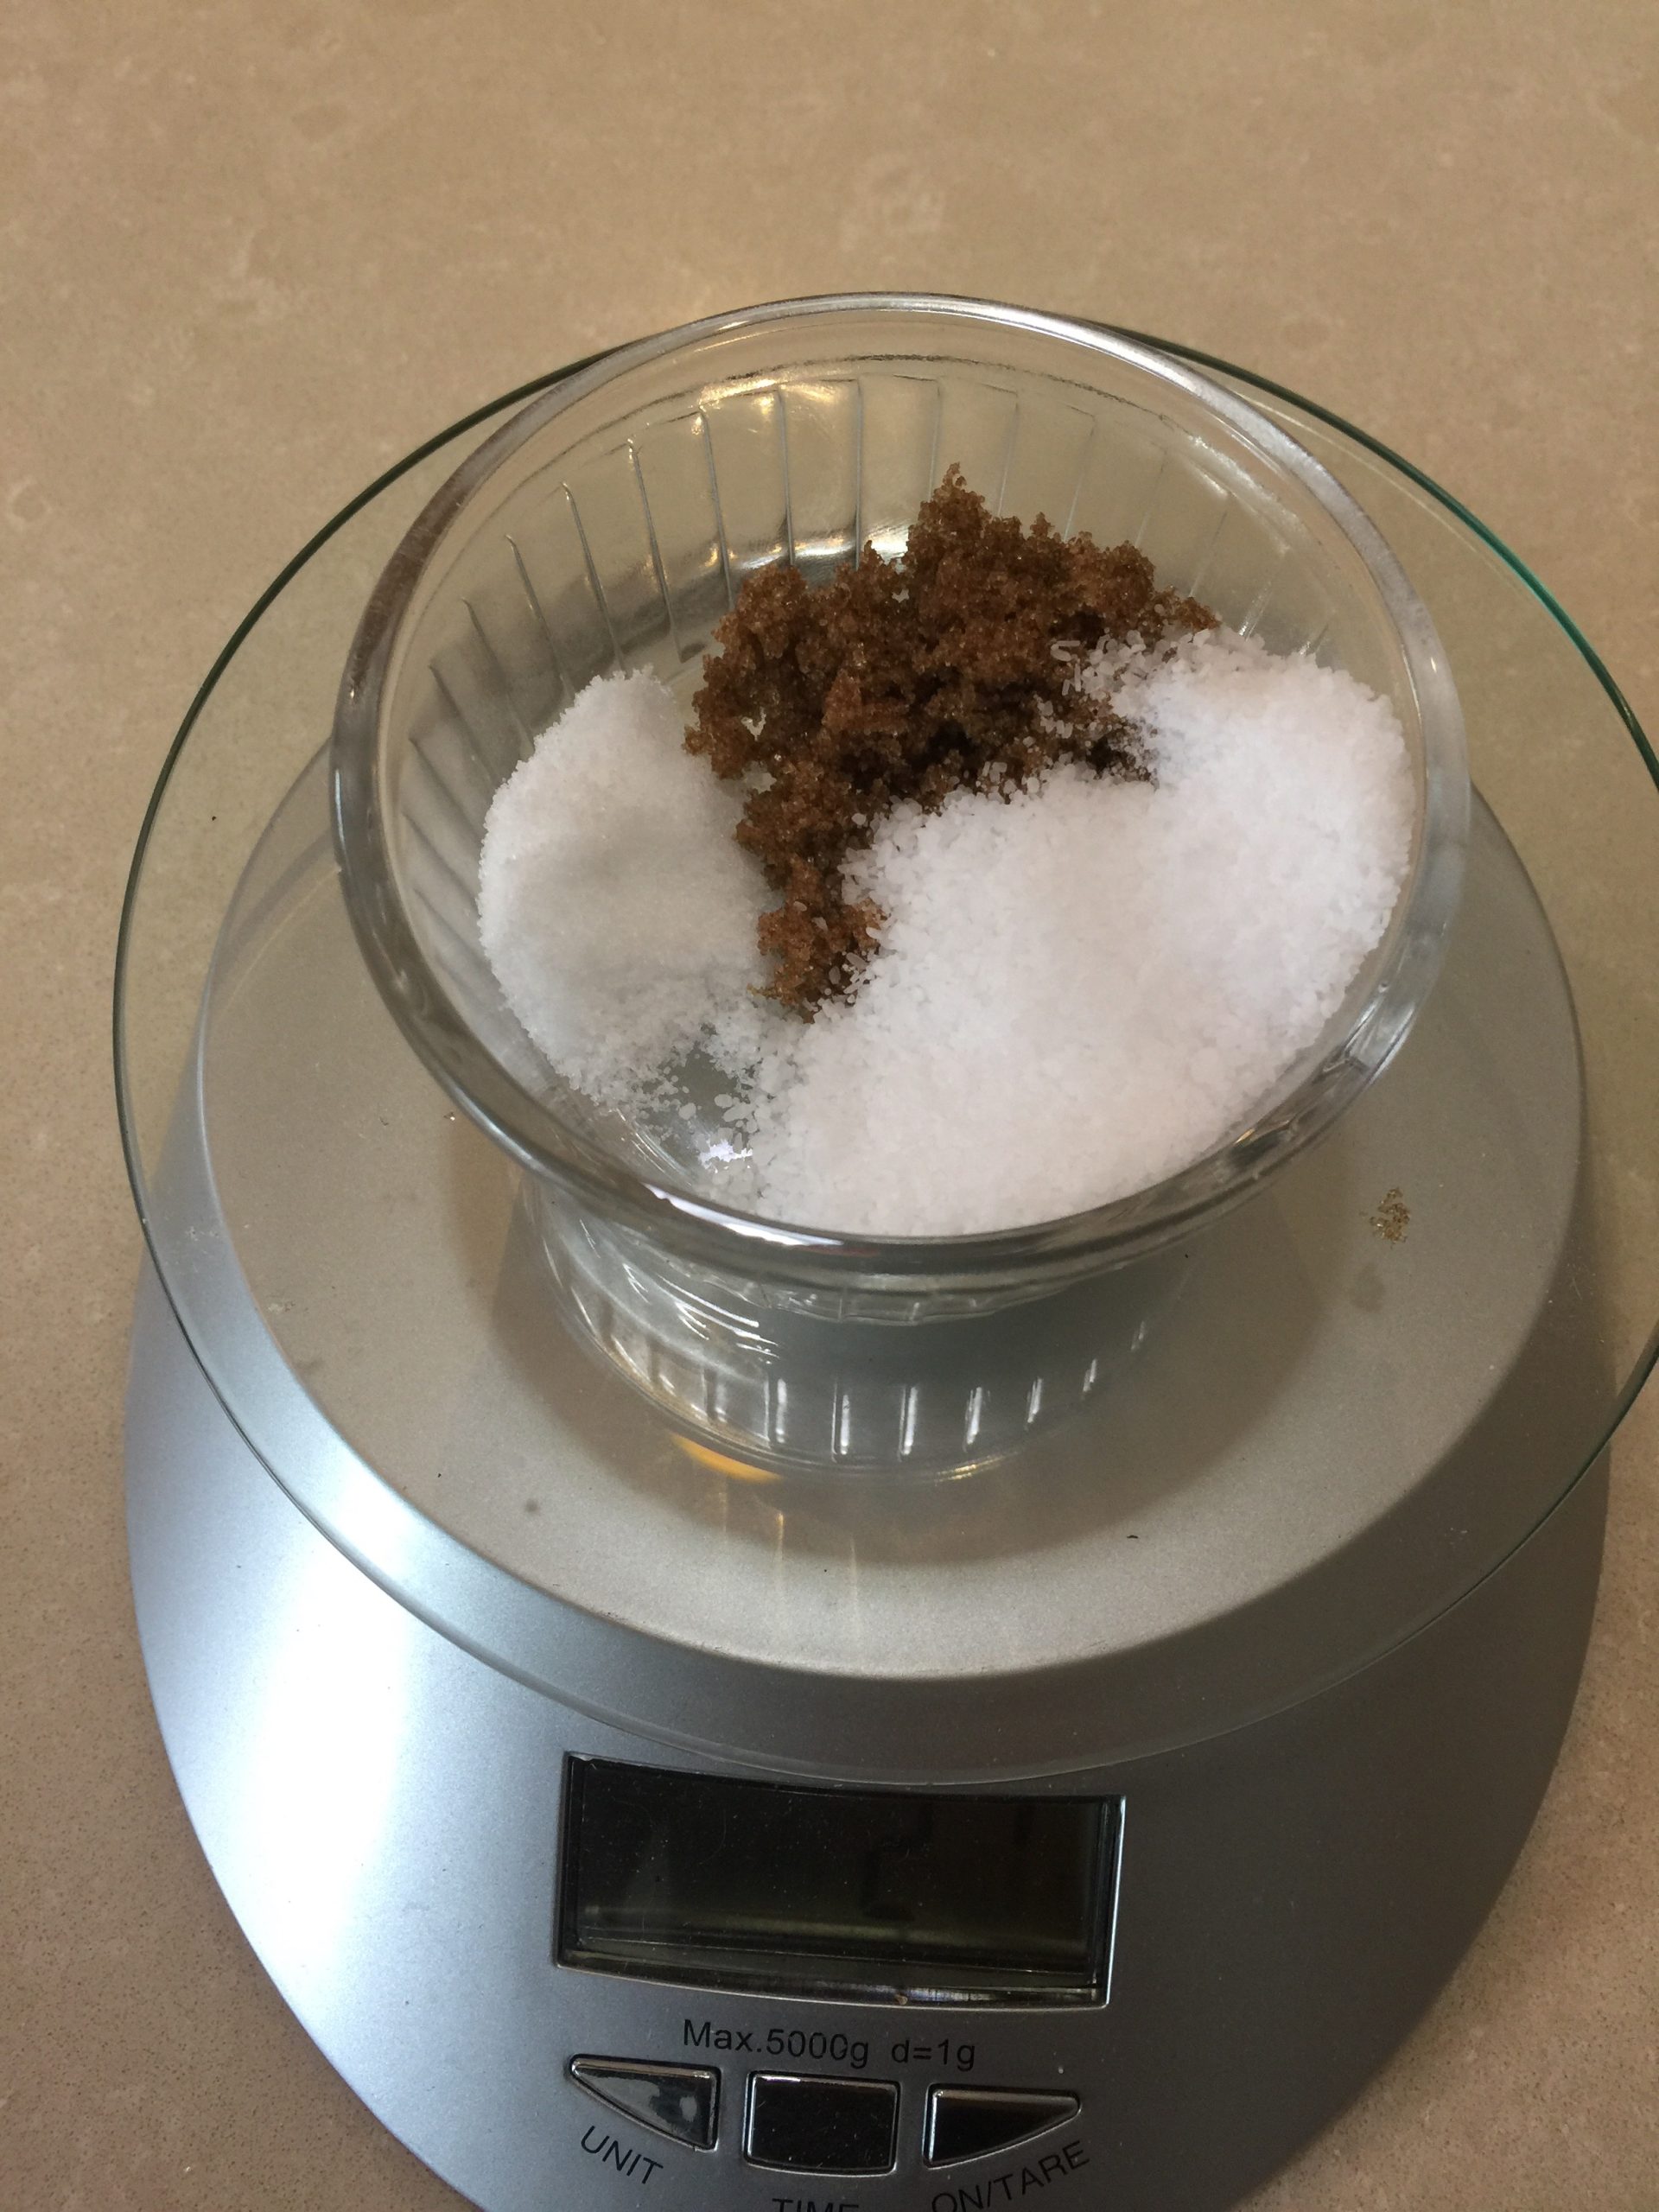
– Kosher salt.
-Dark brown sugar.
– A meat slicer would be nice, however you can hand cut your bacon.
Lets get started.
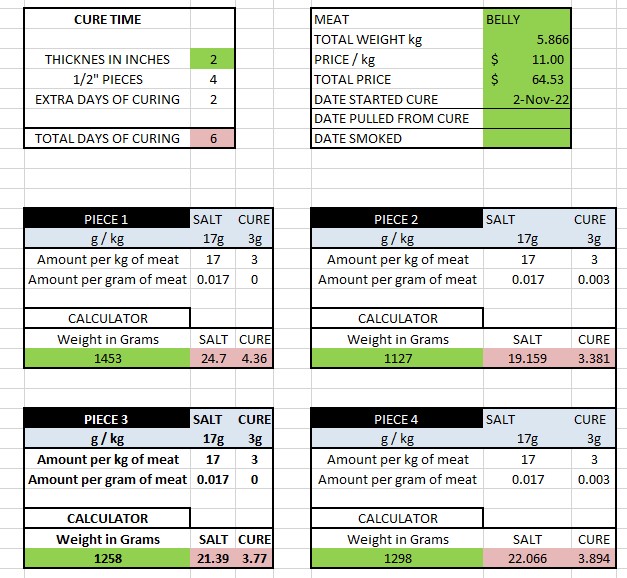
The biggest bacon failures I have read about comes down to the curing. If you put too much you will have a salt bomb. It is not that difficult if you use a scale and proper math. The calculator I made on the left will give you the precise amounts of ingredients and the length of time to cure.
(download the calculator here).
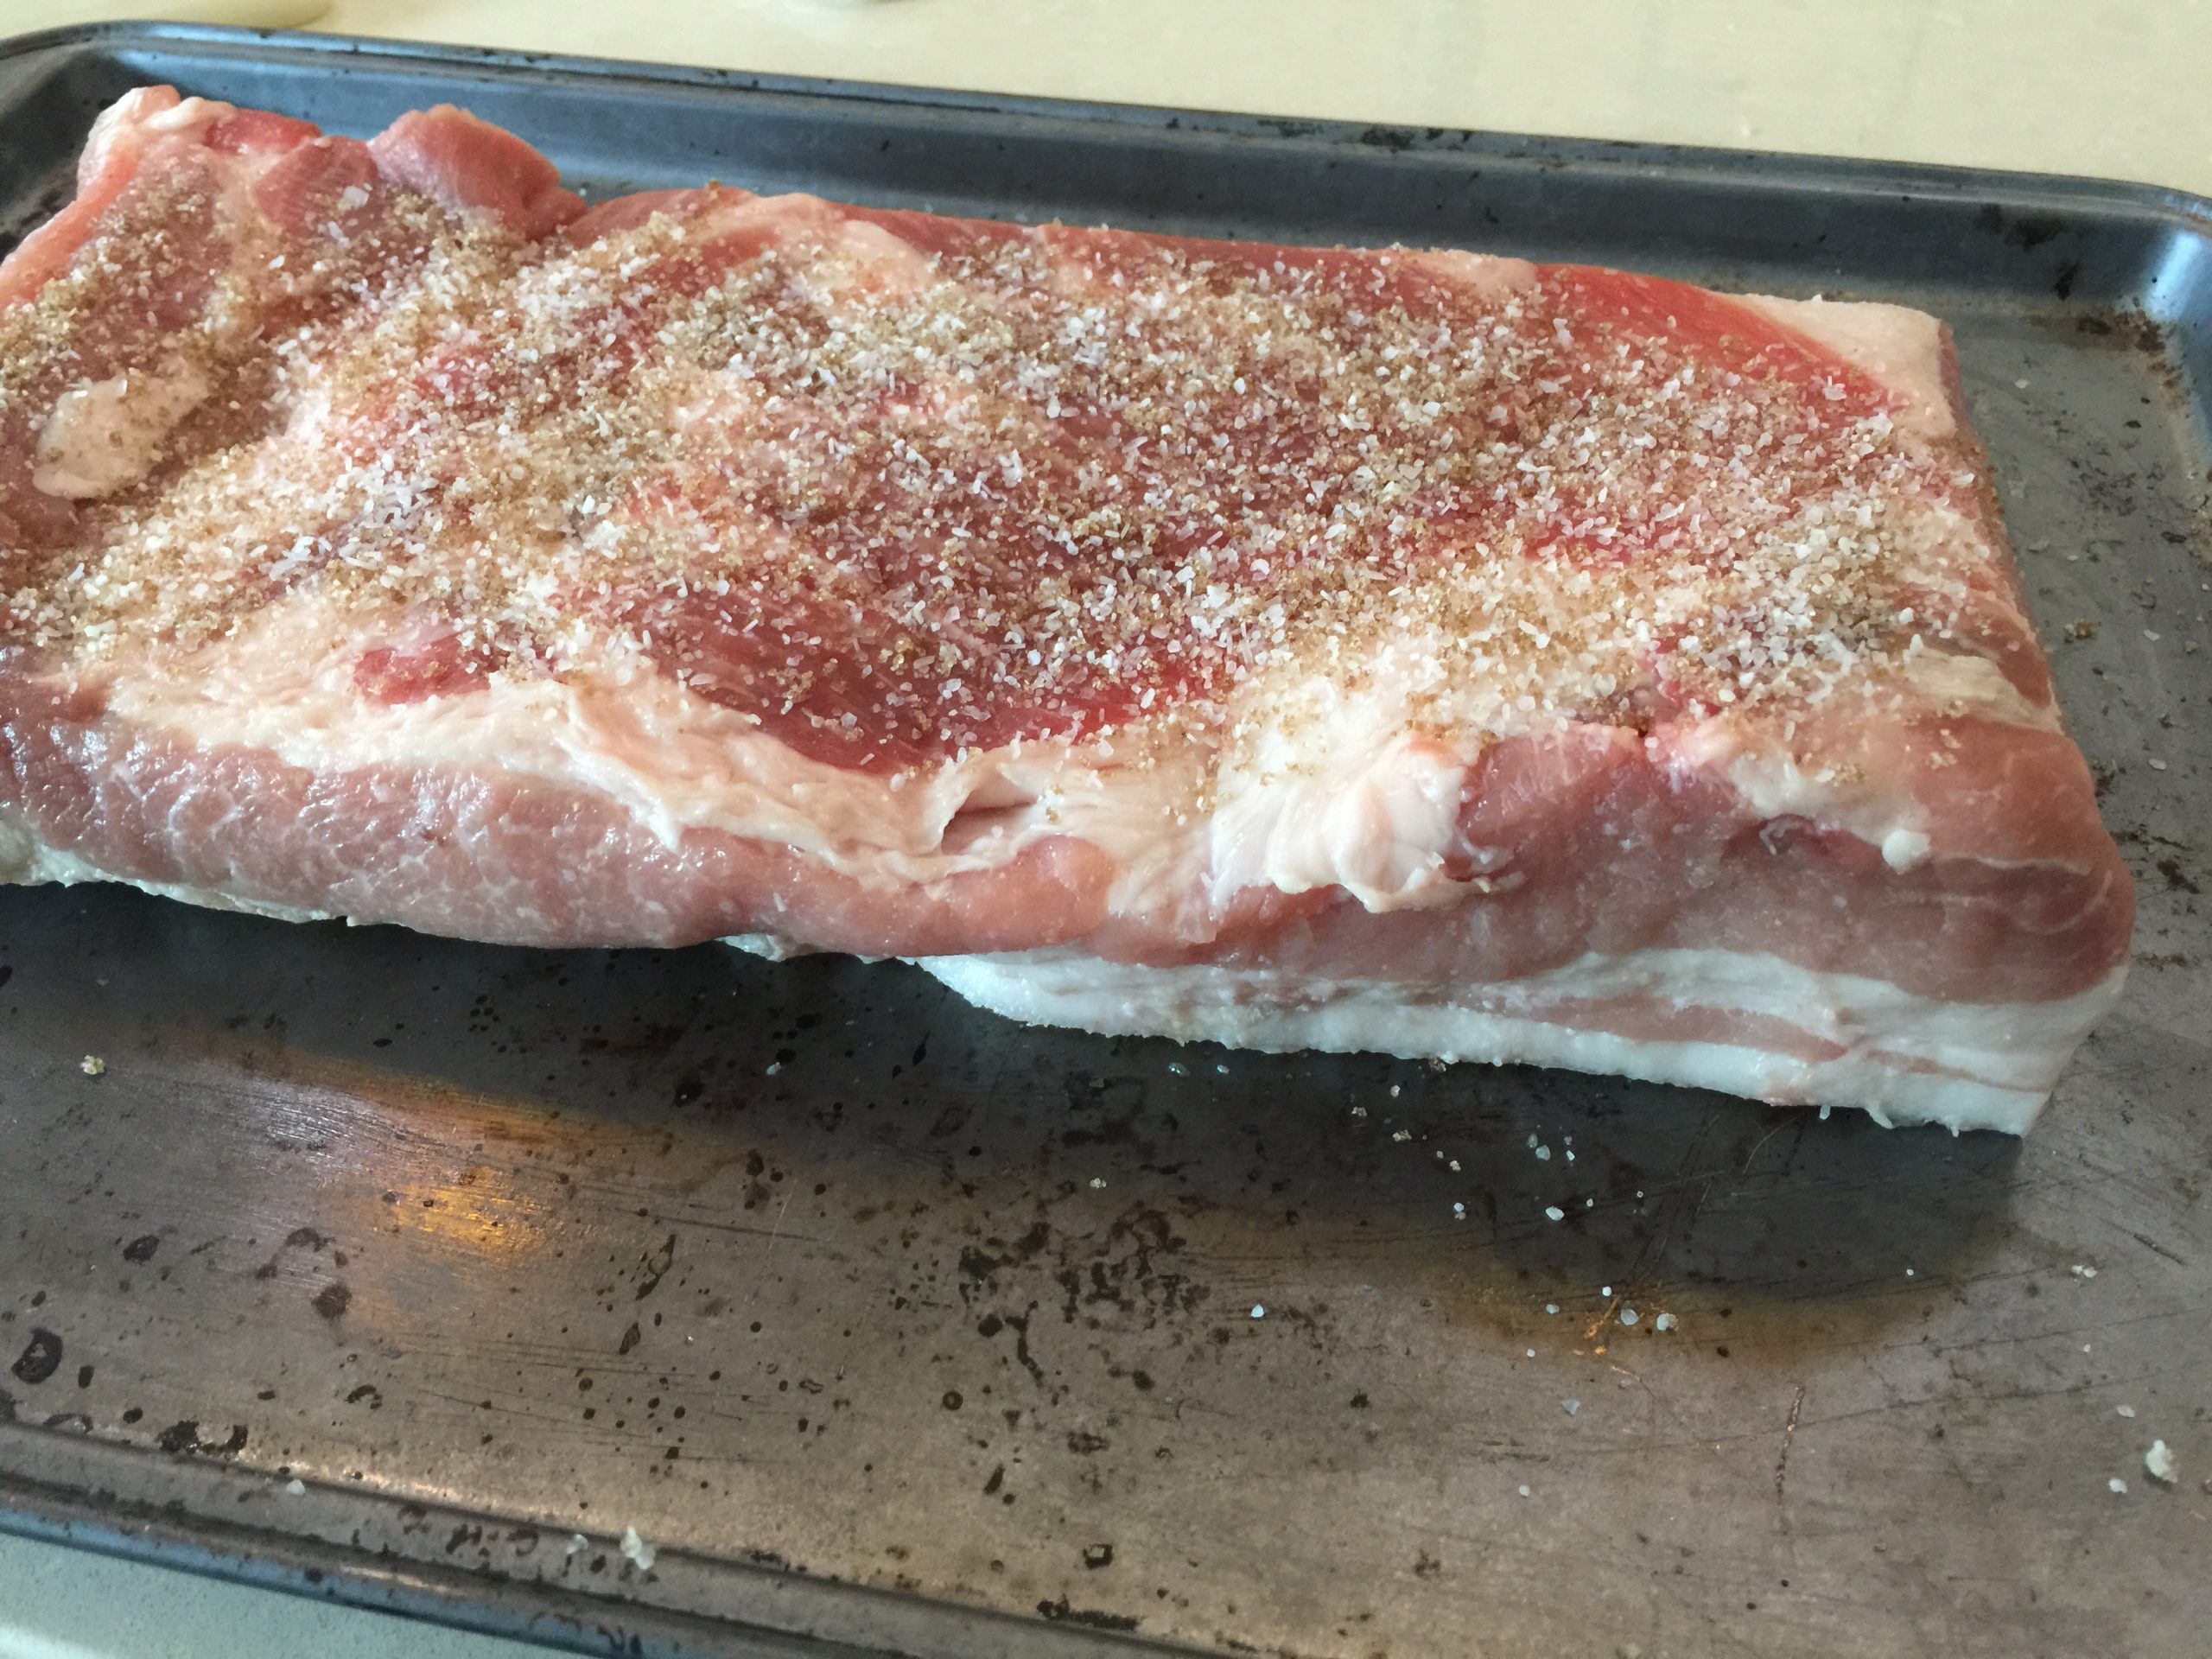
I start by cutting my whole belly in 4 nice pieces. I will try and square them off to fit nicely through my meat slicer. Any scraps I freeze to use when we make sausages. Each piece will get weighed and the values will be entered in the green sections of calculator to get the amounts of salt and cure for each piece.
The mix of salt and cure will be rubbed all over both sides and ends of the belly slab. I do this on a baking sheet. You will then transfer it into a large Zip Lock bag making sure not to leave any salt or cure behind.
In the photos below you will see brown sugar on the scale with the salt and cure. The calculator at one point added some sugar. I have since removed that and add a full cup to each bag.


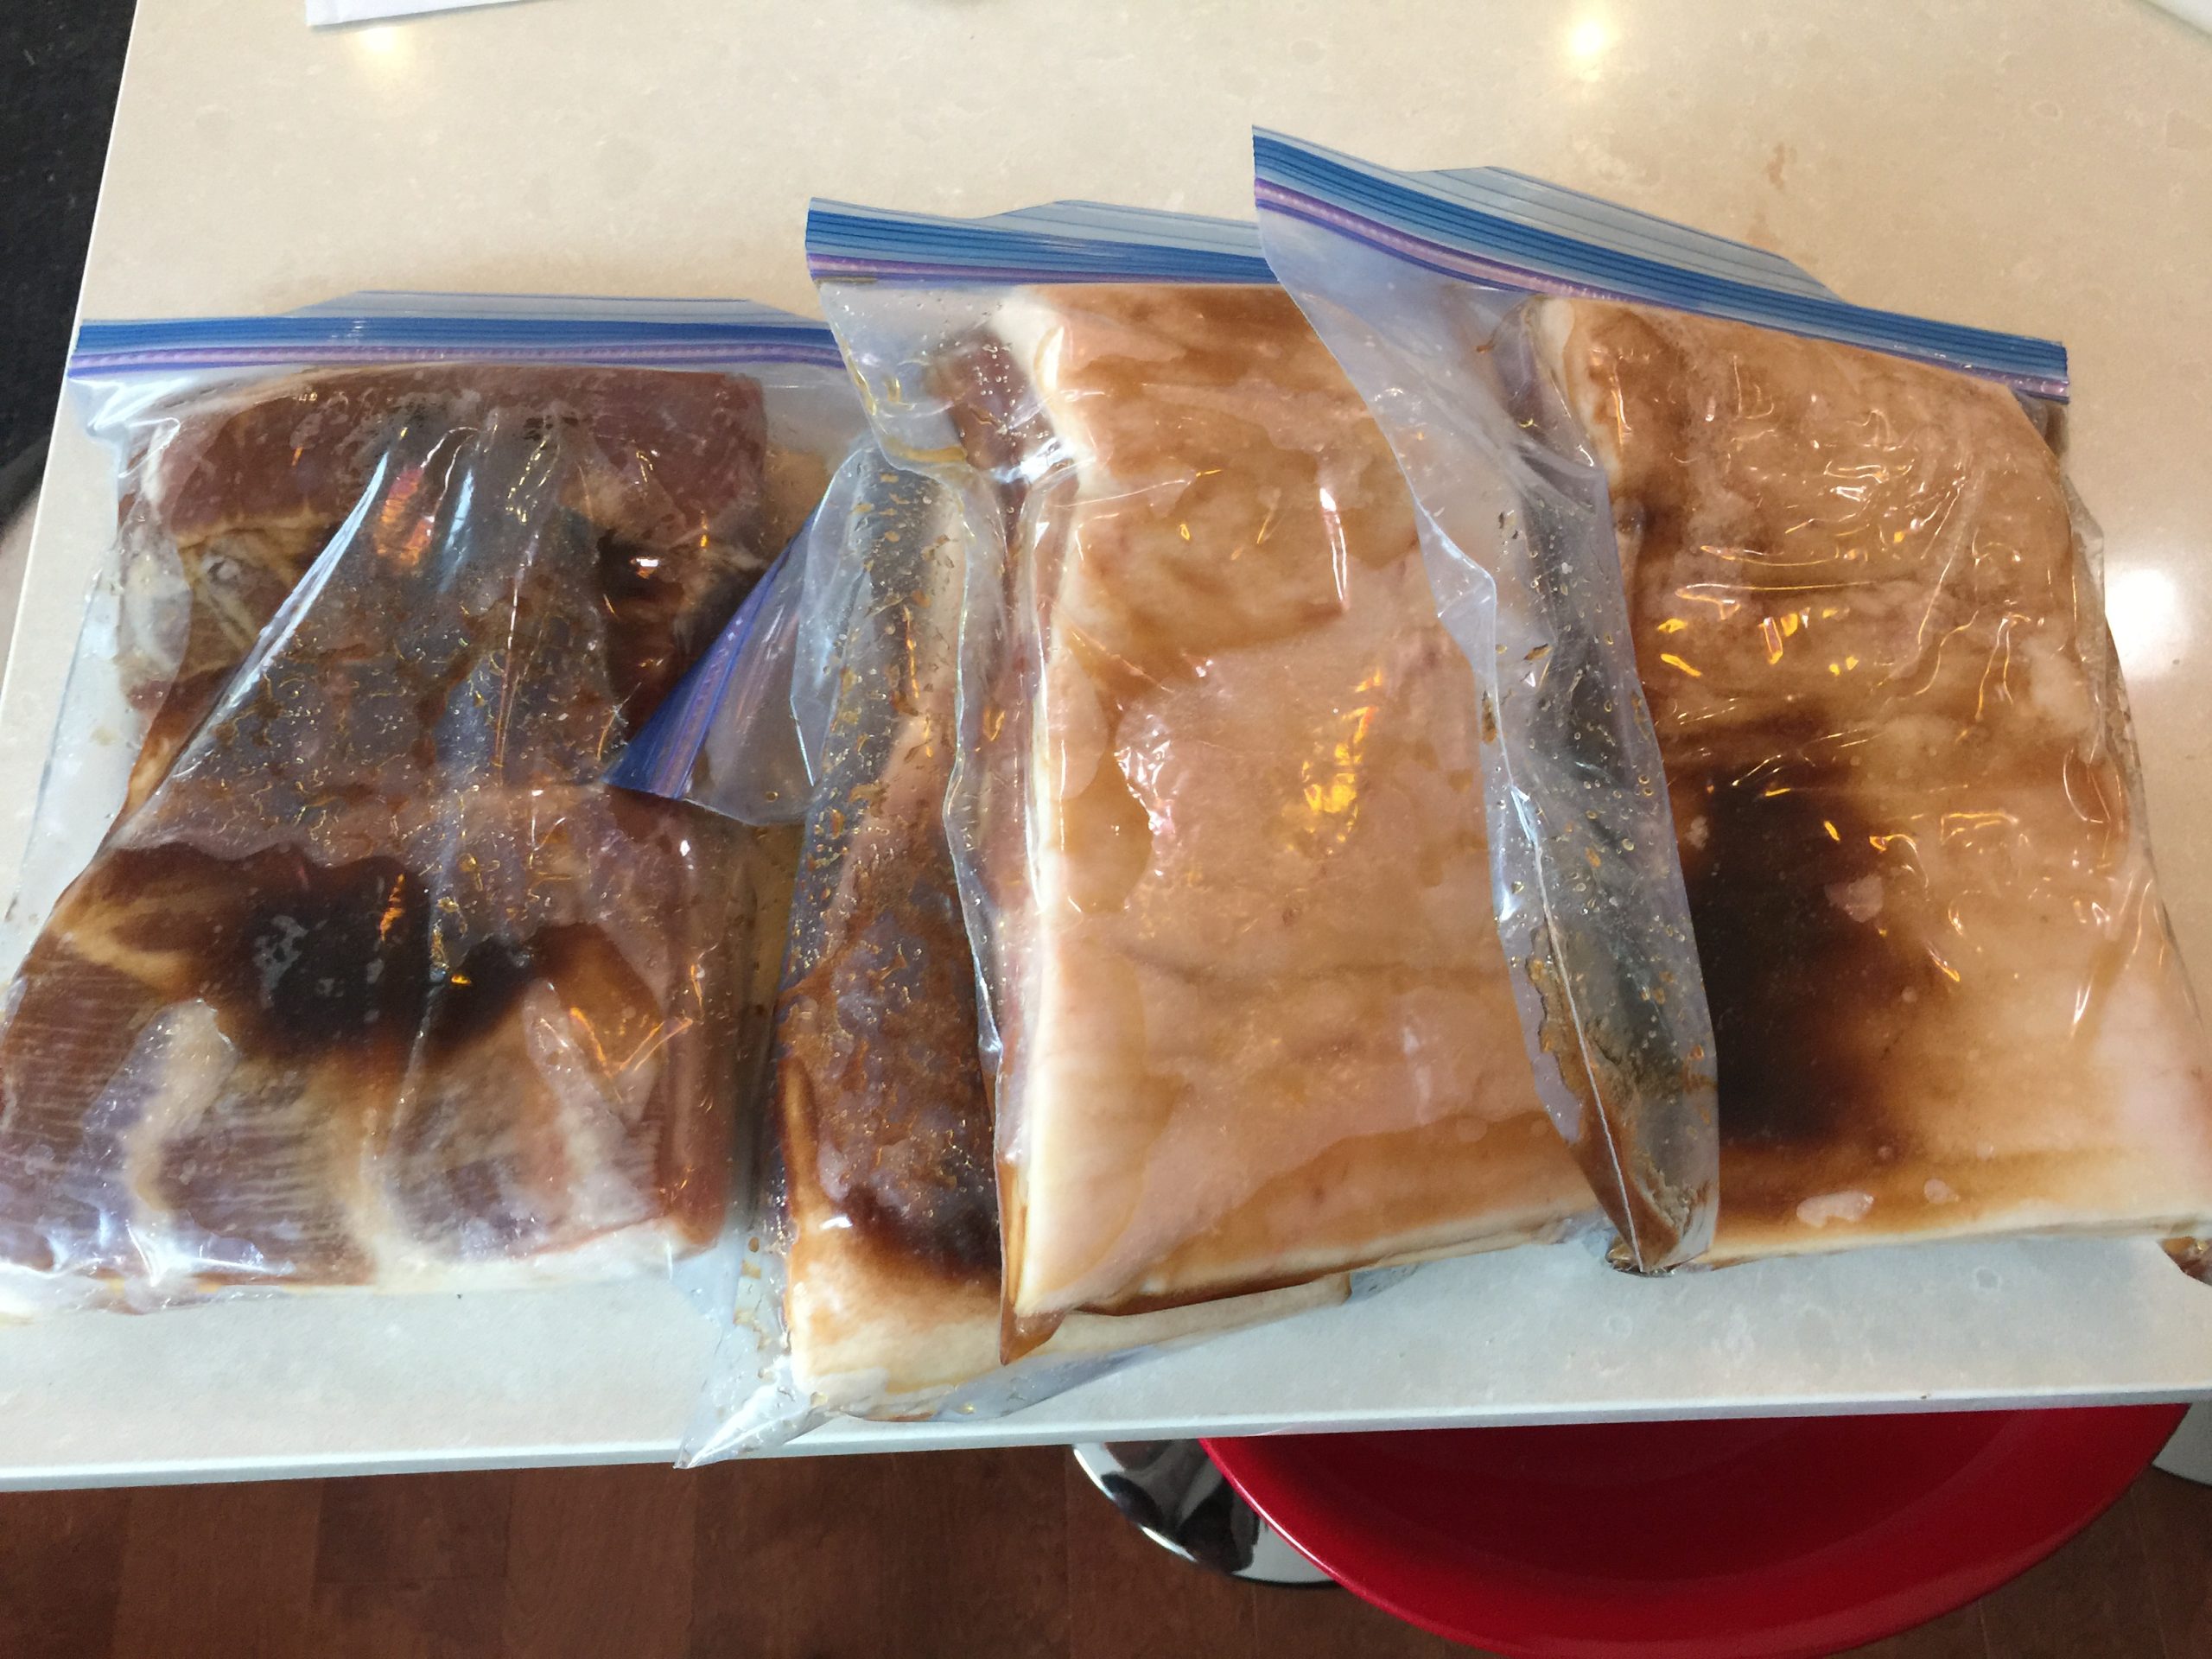
Once in the bags, squeeze out any air and seal. Put on a cookie sheet and put in refrigerator. Every day go into the refrigerator and give each bag a good massage and put back on the opposite side. Do this for as many days as the calculator indicates. (usually 5-7 days). Each day you will notice more liquid in the bag, this is the salt and cure pulling out moisture from the meat.
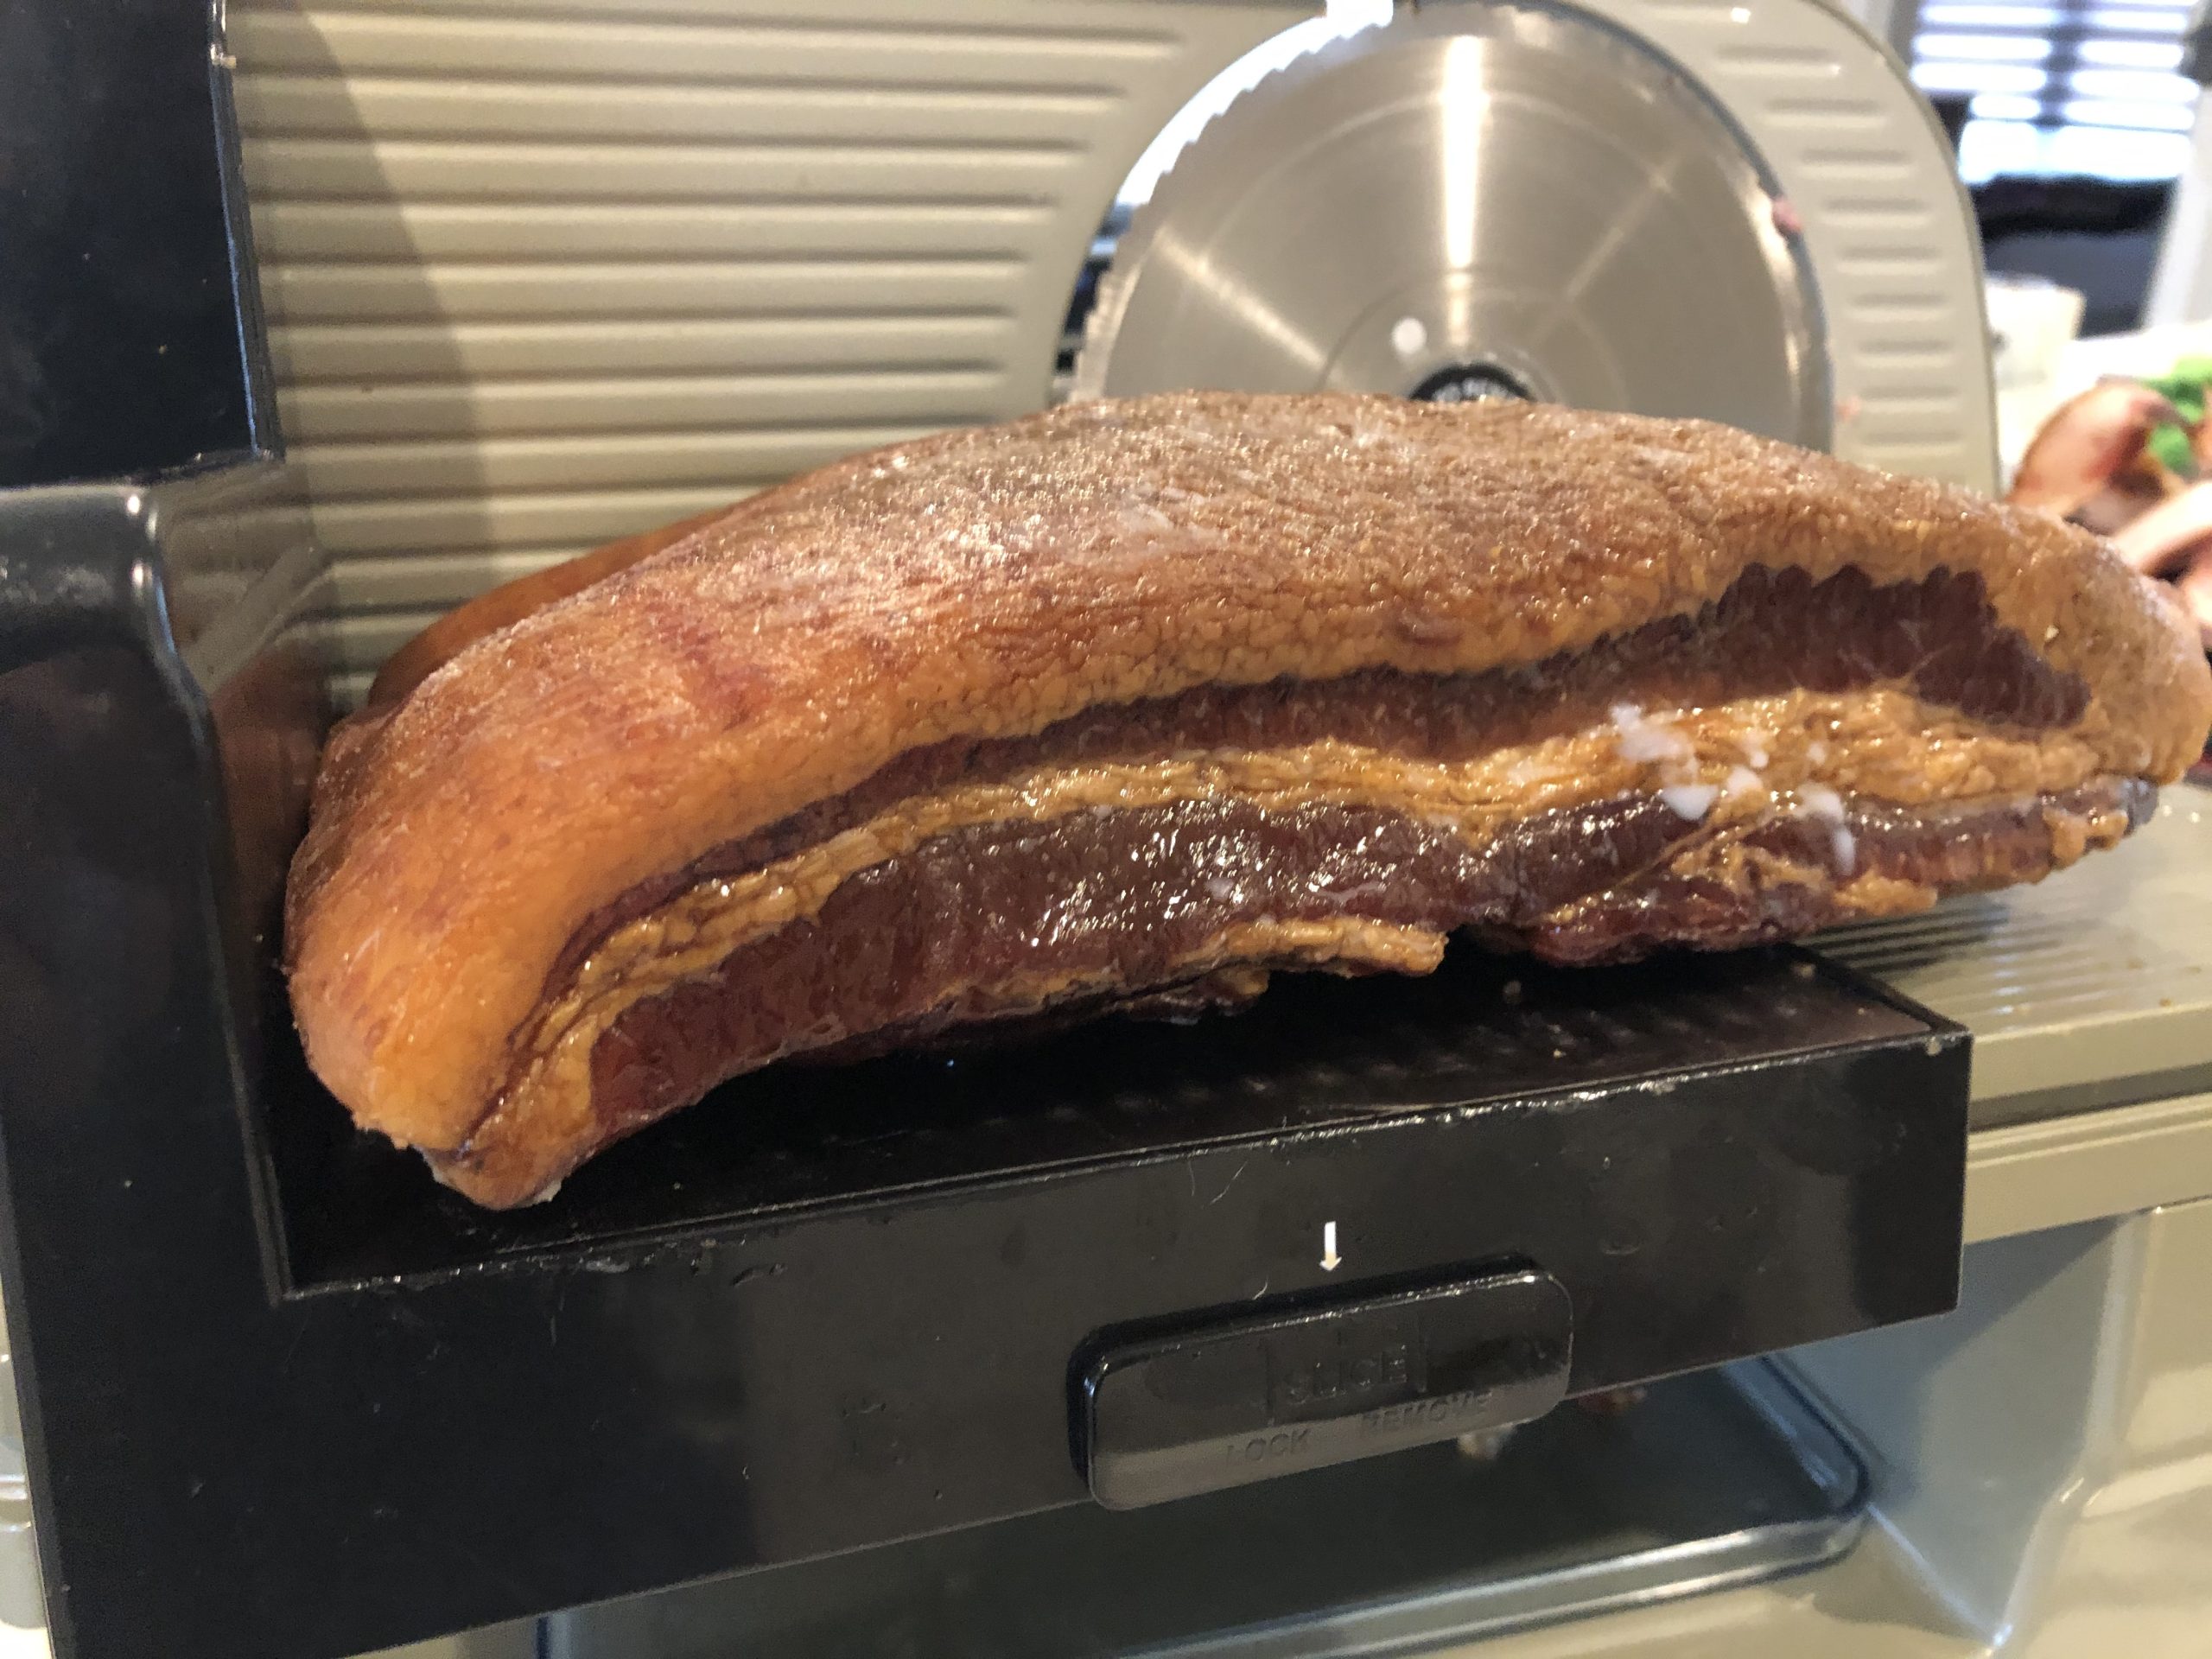
Once the allotted days have passed pull them from the fridge and give them a good rinse under cold water. You will notice the pieces are much firmer than when you started. Dry off each piece thoroughly with paper towel and place on a wire rack. They will go back in the fridge overnight uncovered. The open air will allow a pellicle to form. The pellicle is a dry sticky layer that will form on the meat. This better allows the smoke to stick to and flavor the meat.

The pork belly must be gently cooked to finish your preparation. This means either smoking for a traditional flavor or, if no smoker is available, you can slow cook it in a traditional oven. If you cook to aggressively you melt that beautiful fat, we don’t want to do that until cook it for our plate.
You want to put your thermometer probe into the thickest part of each piece. On my smoker a Smokin-It smoker, I have used 4oz of wood. I use a mix of apple and cherry.
I smoke my bacon at 145° for two hours. After two hours up the temp to 200° and continue to cook until the internal temperature (IT) hits 150°.
Allow your slabs to cool on the counter then wrap in plastic wrap and put in the fridge over night to allow that smoke to mellow into that belly.


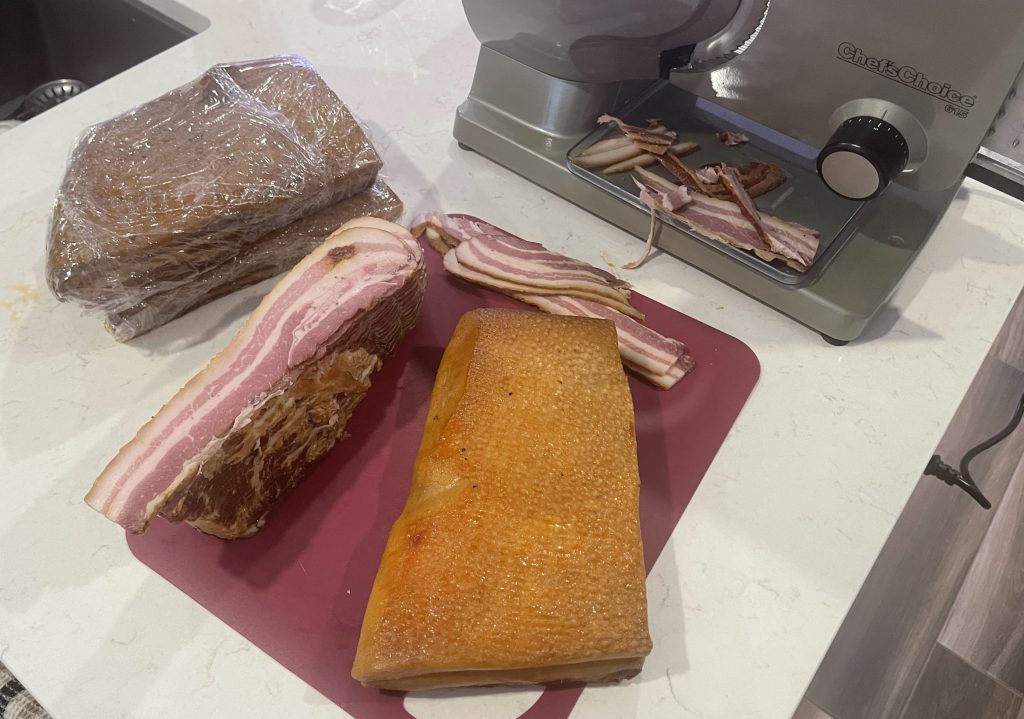
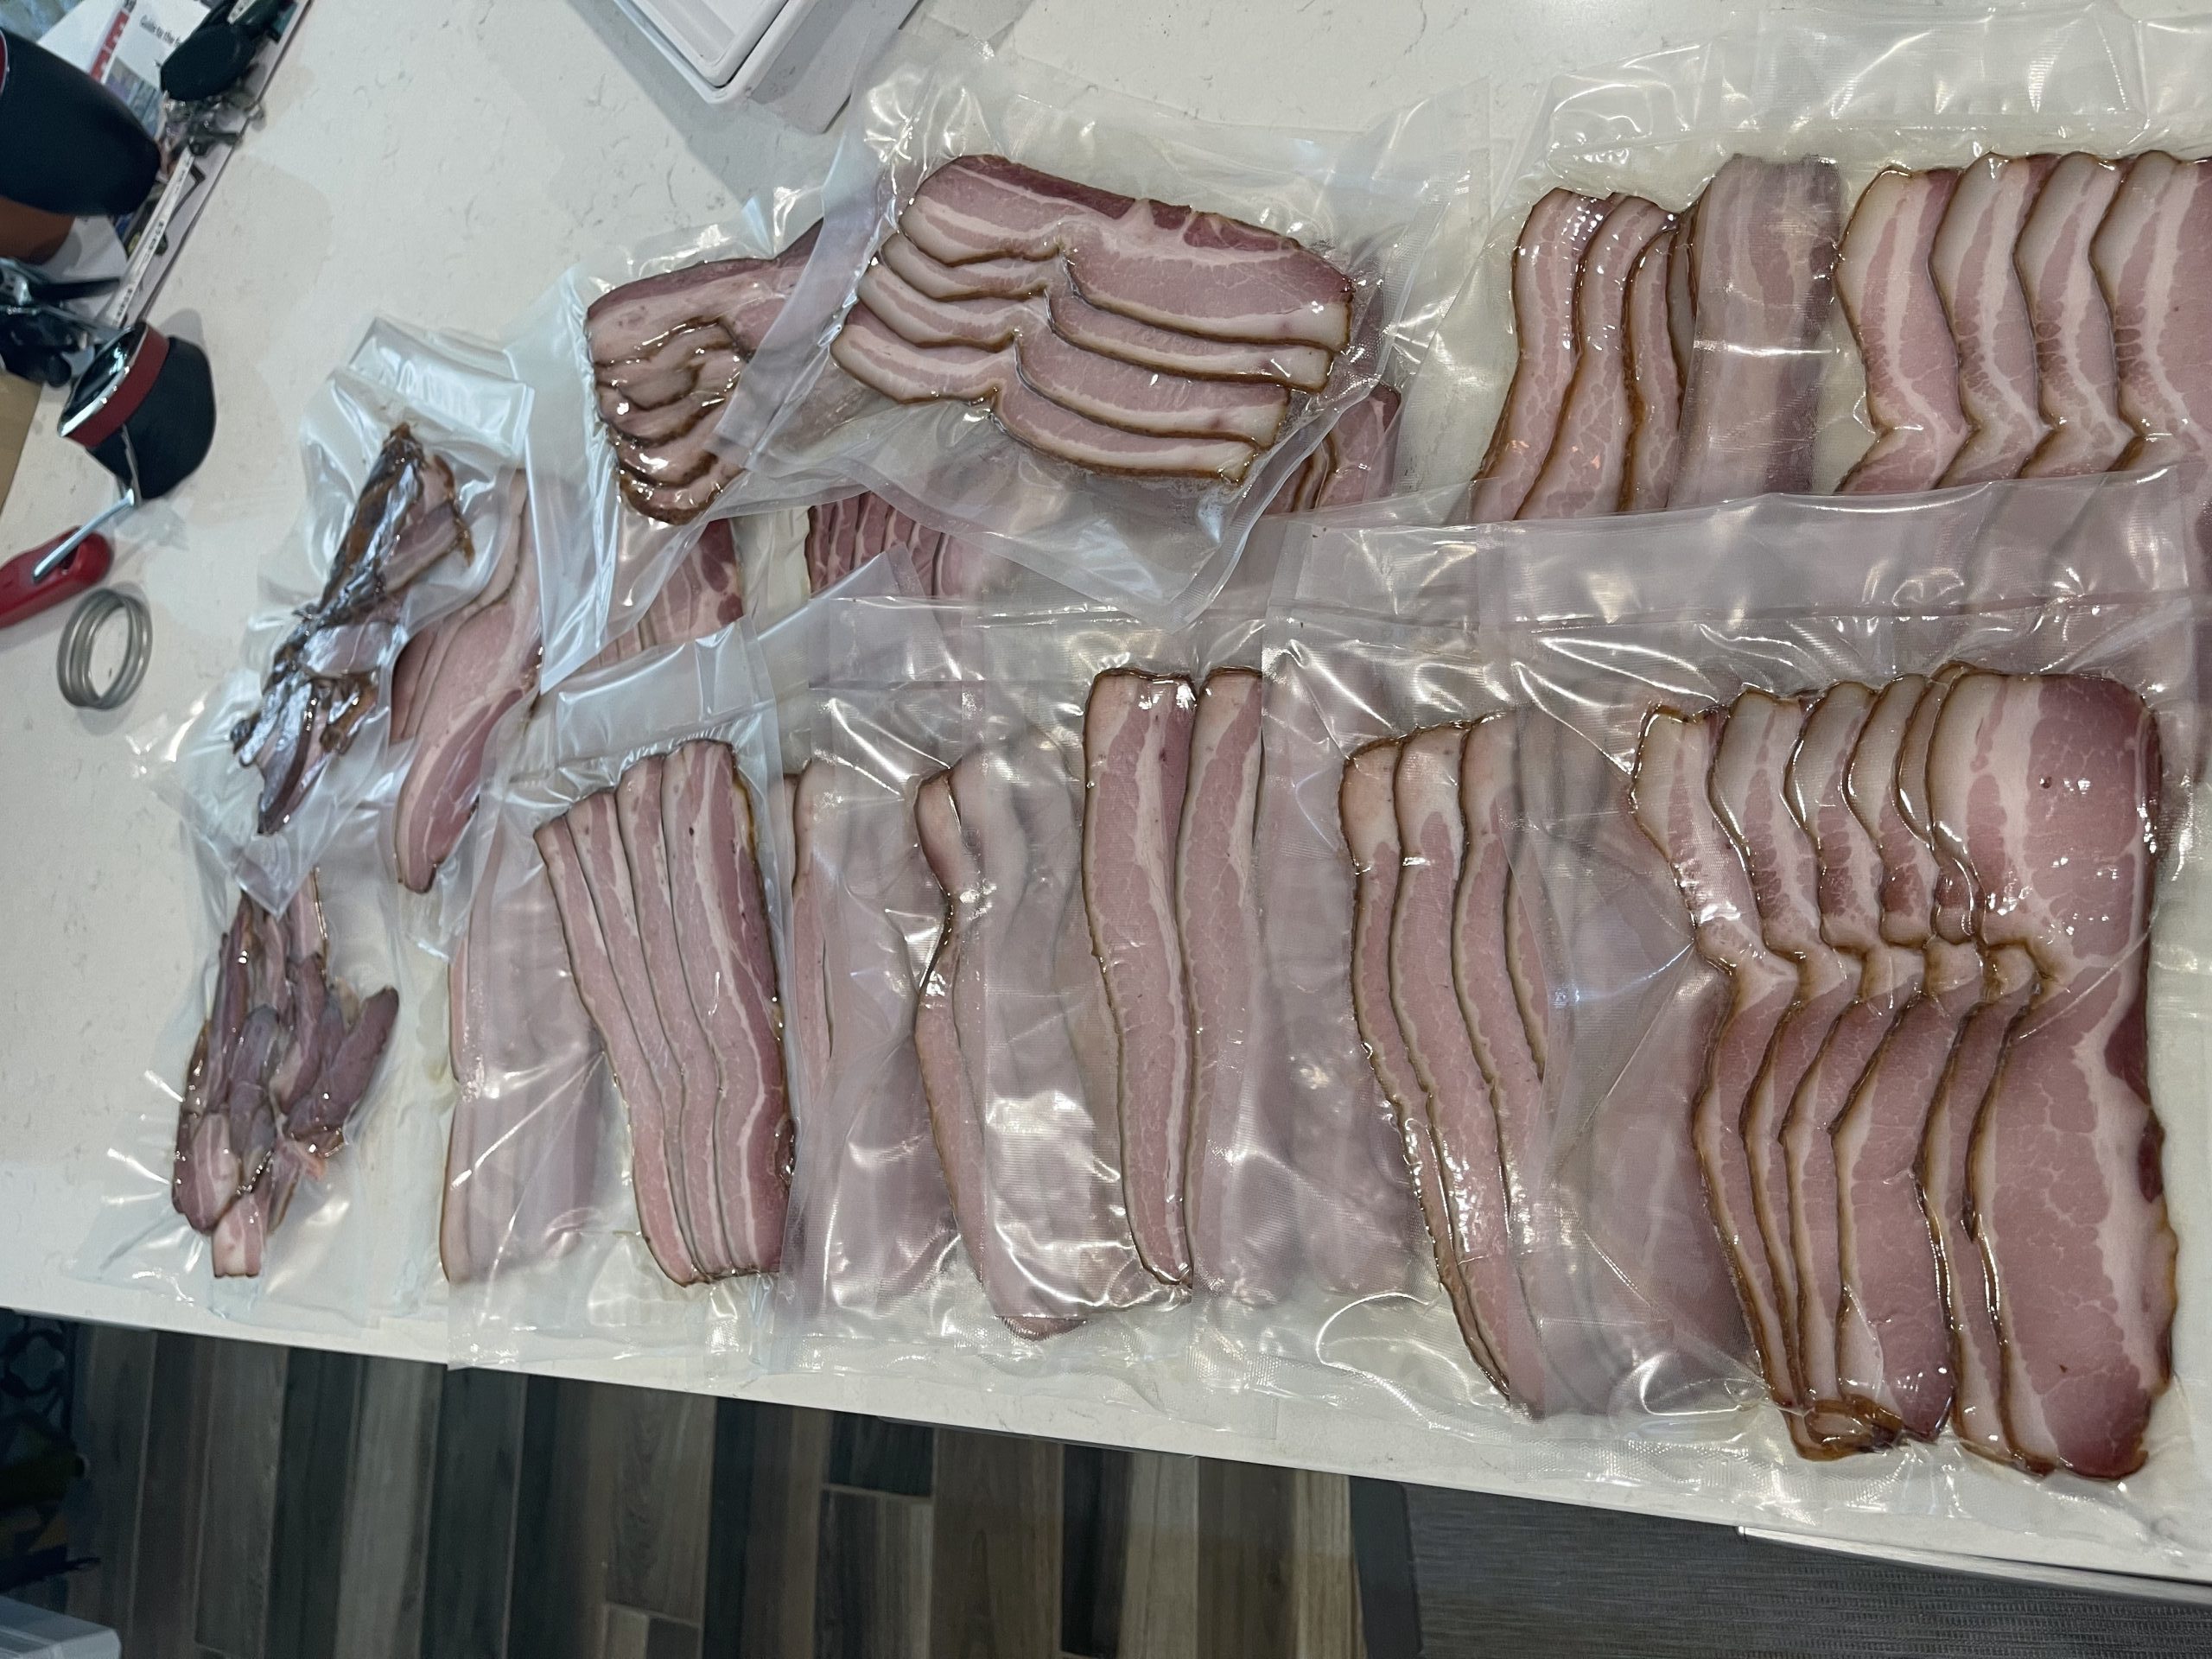
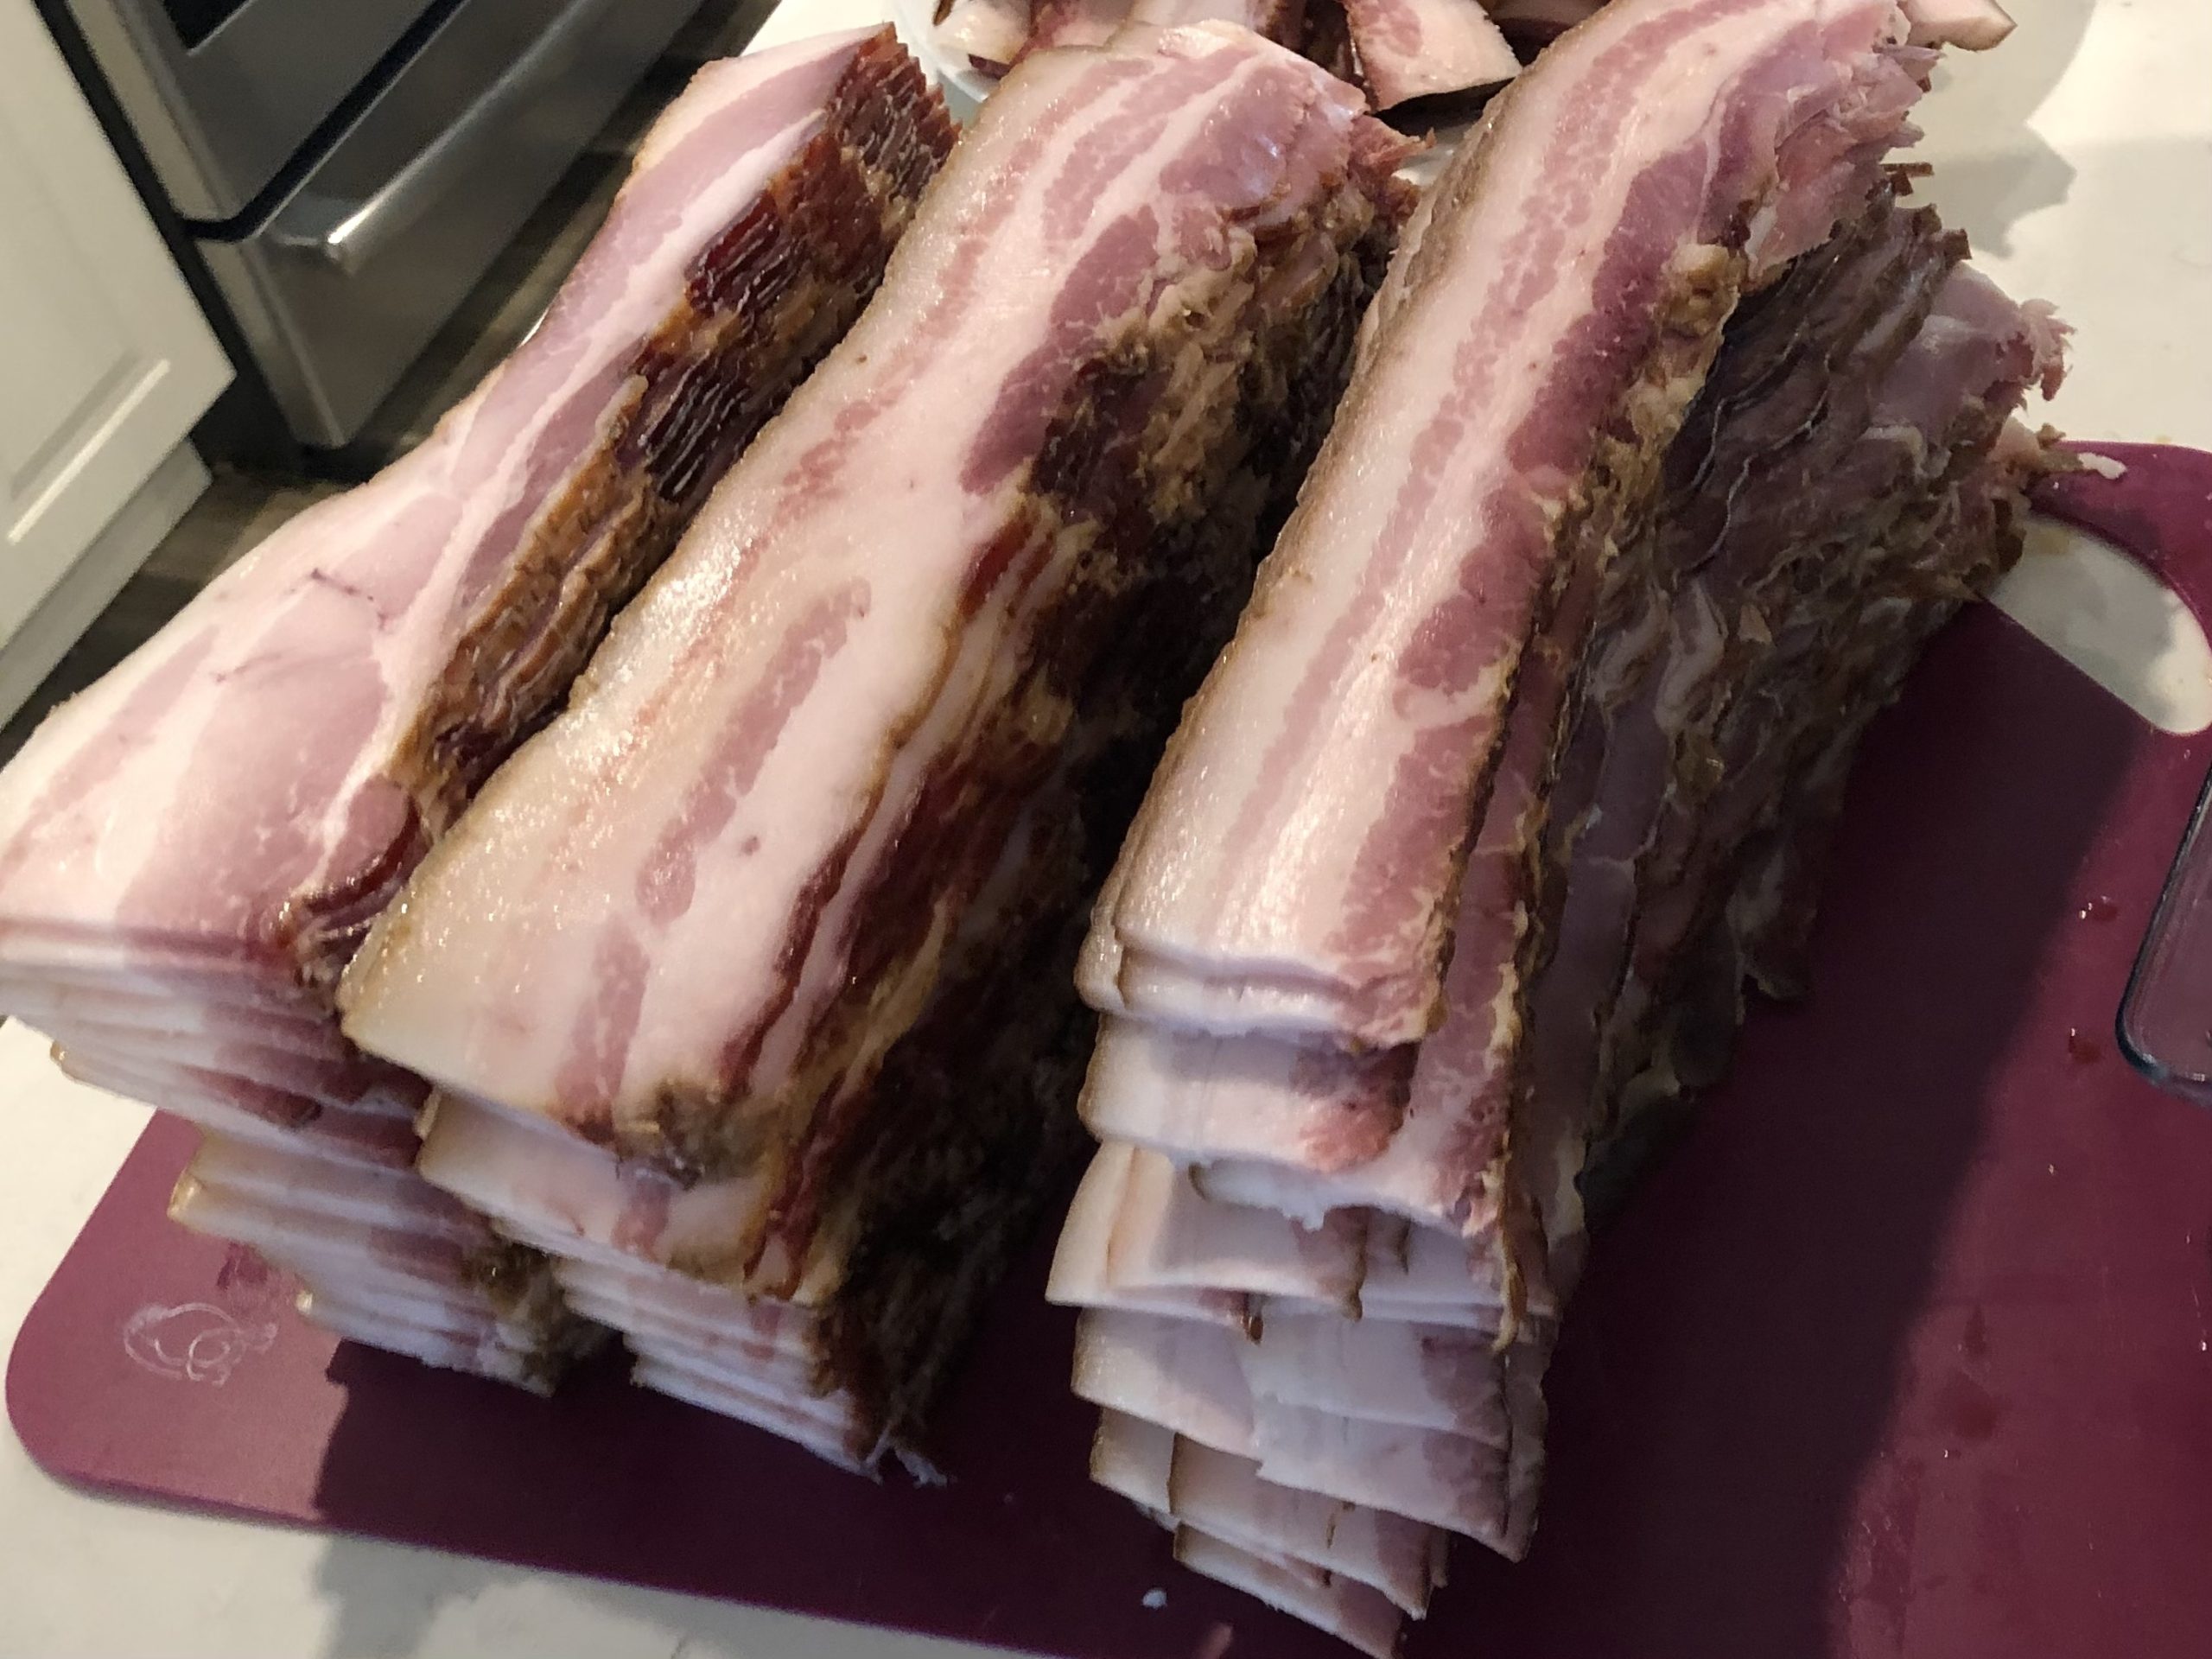
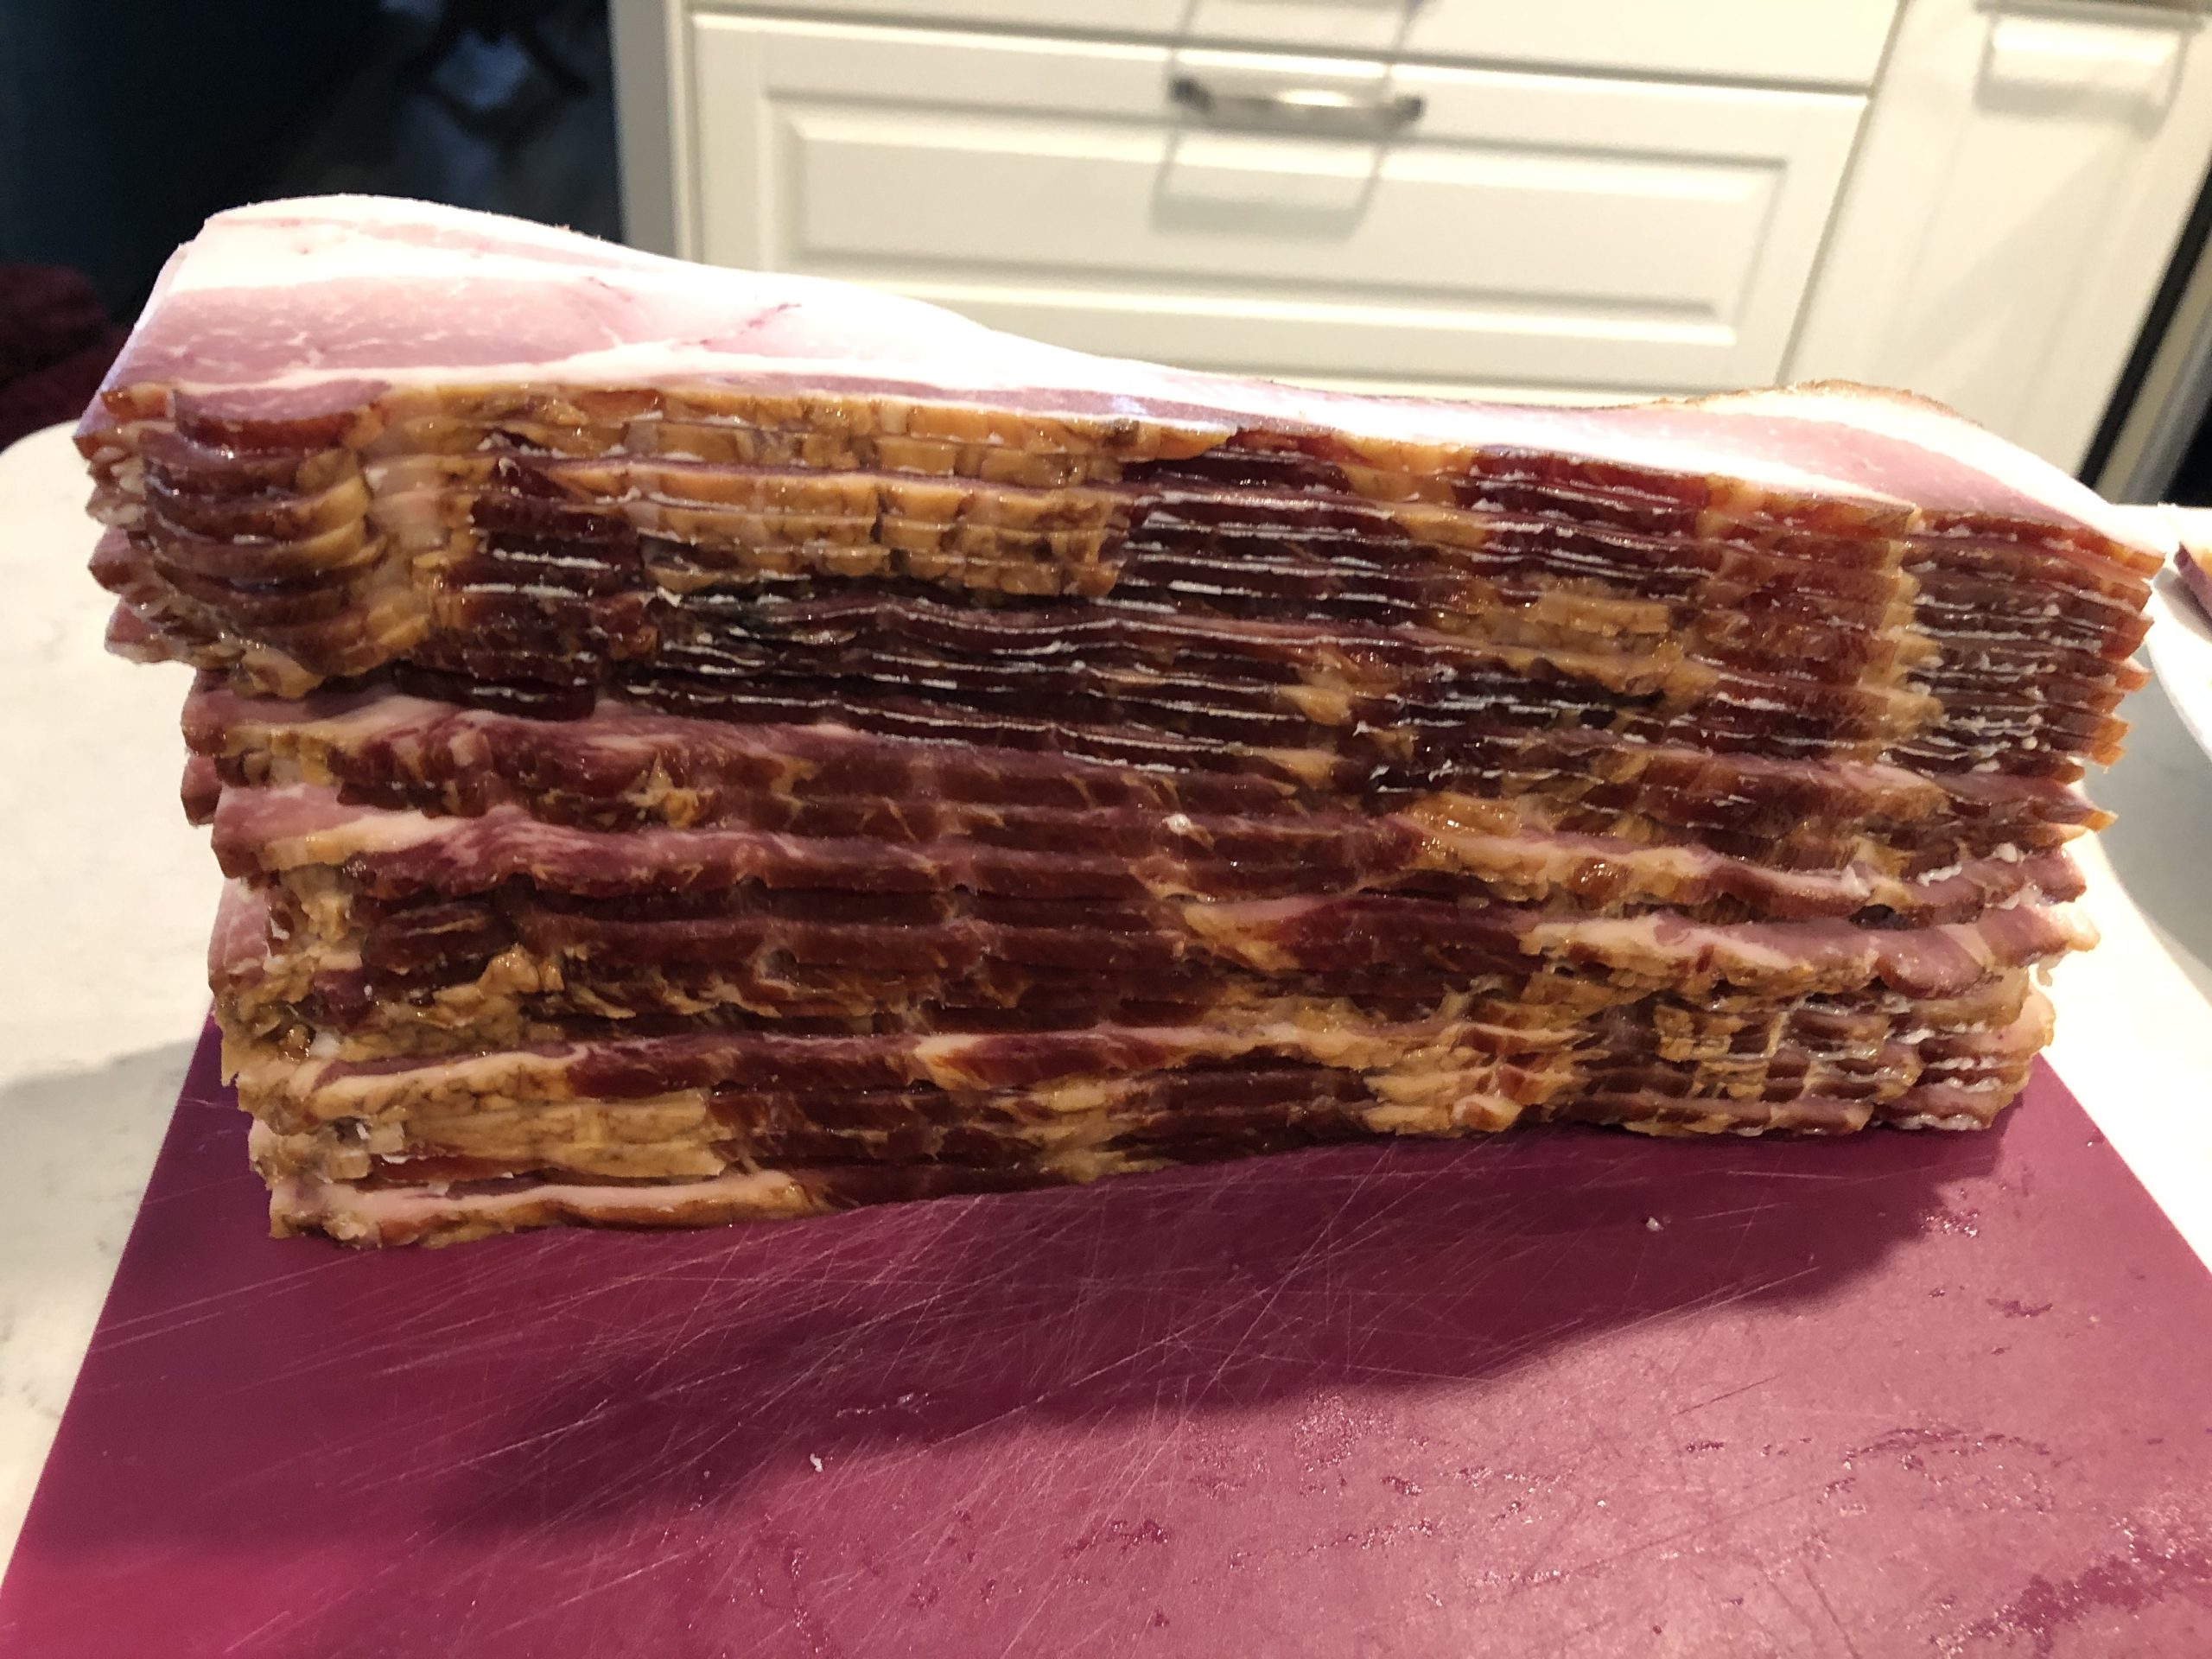
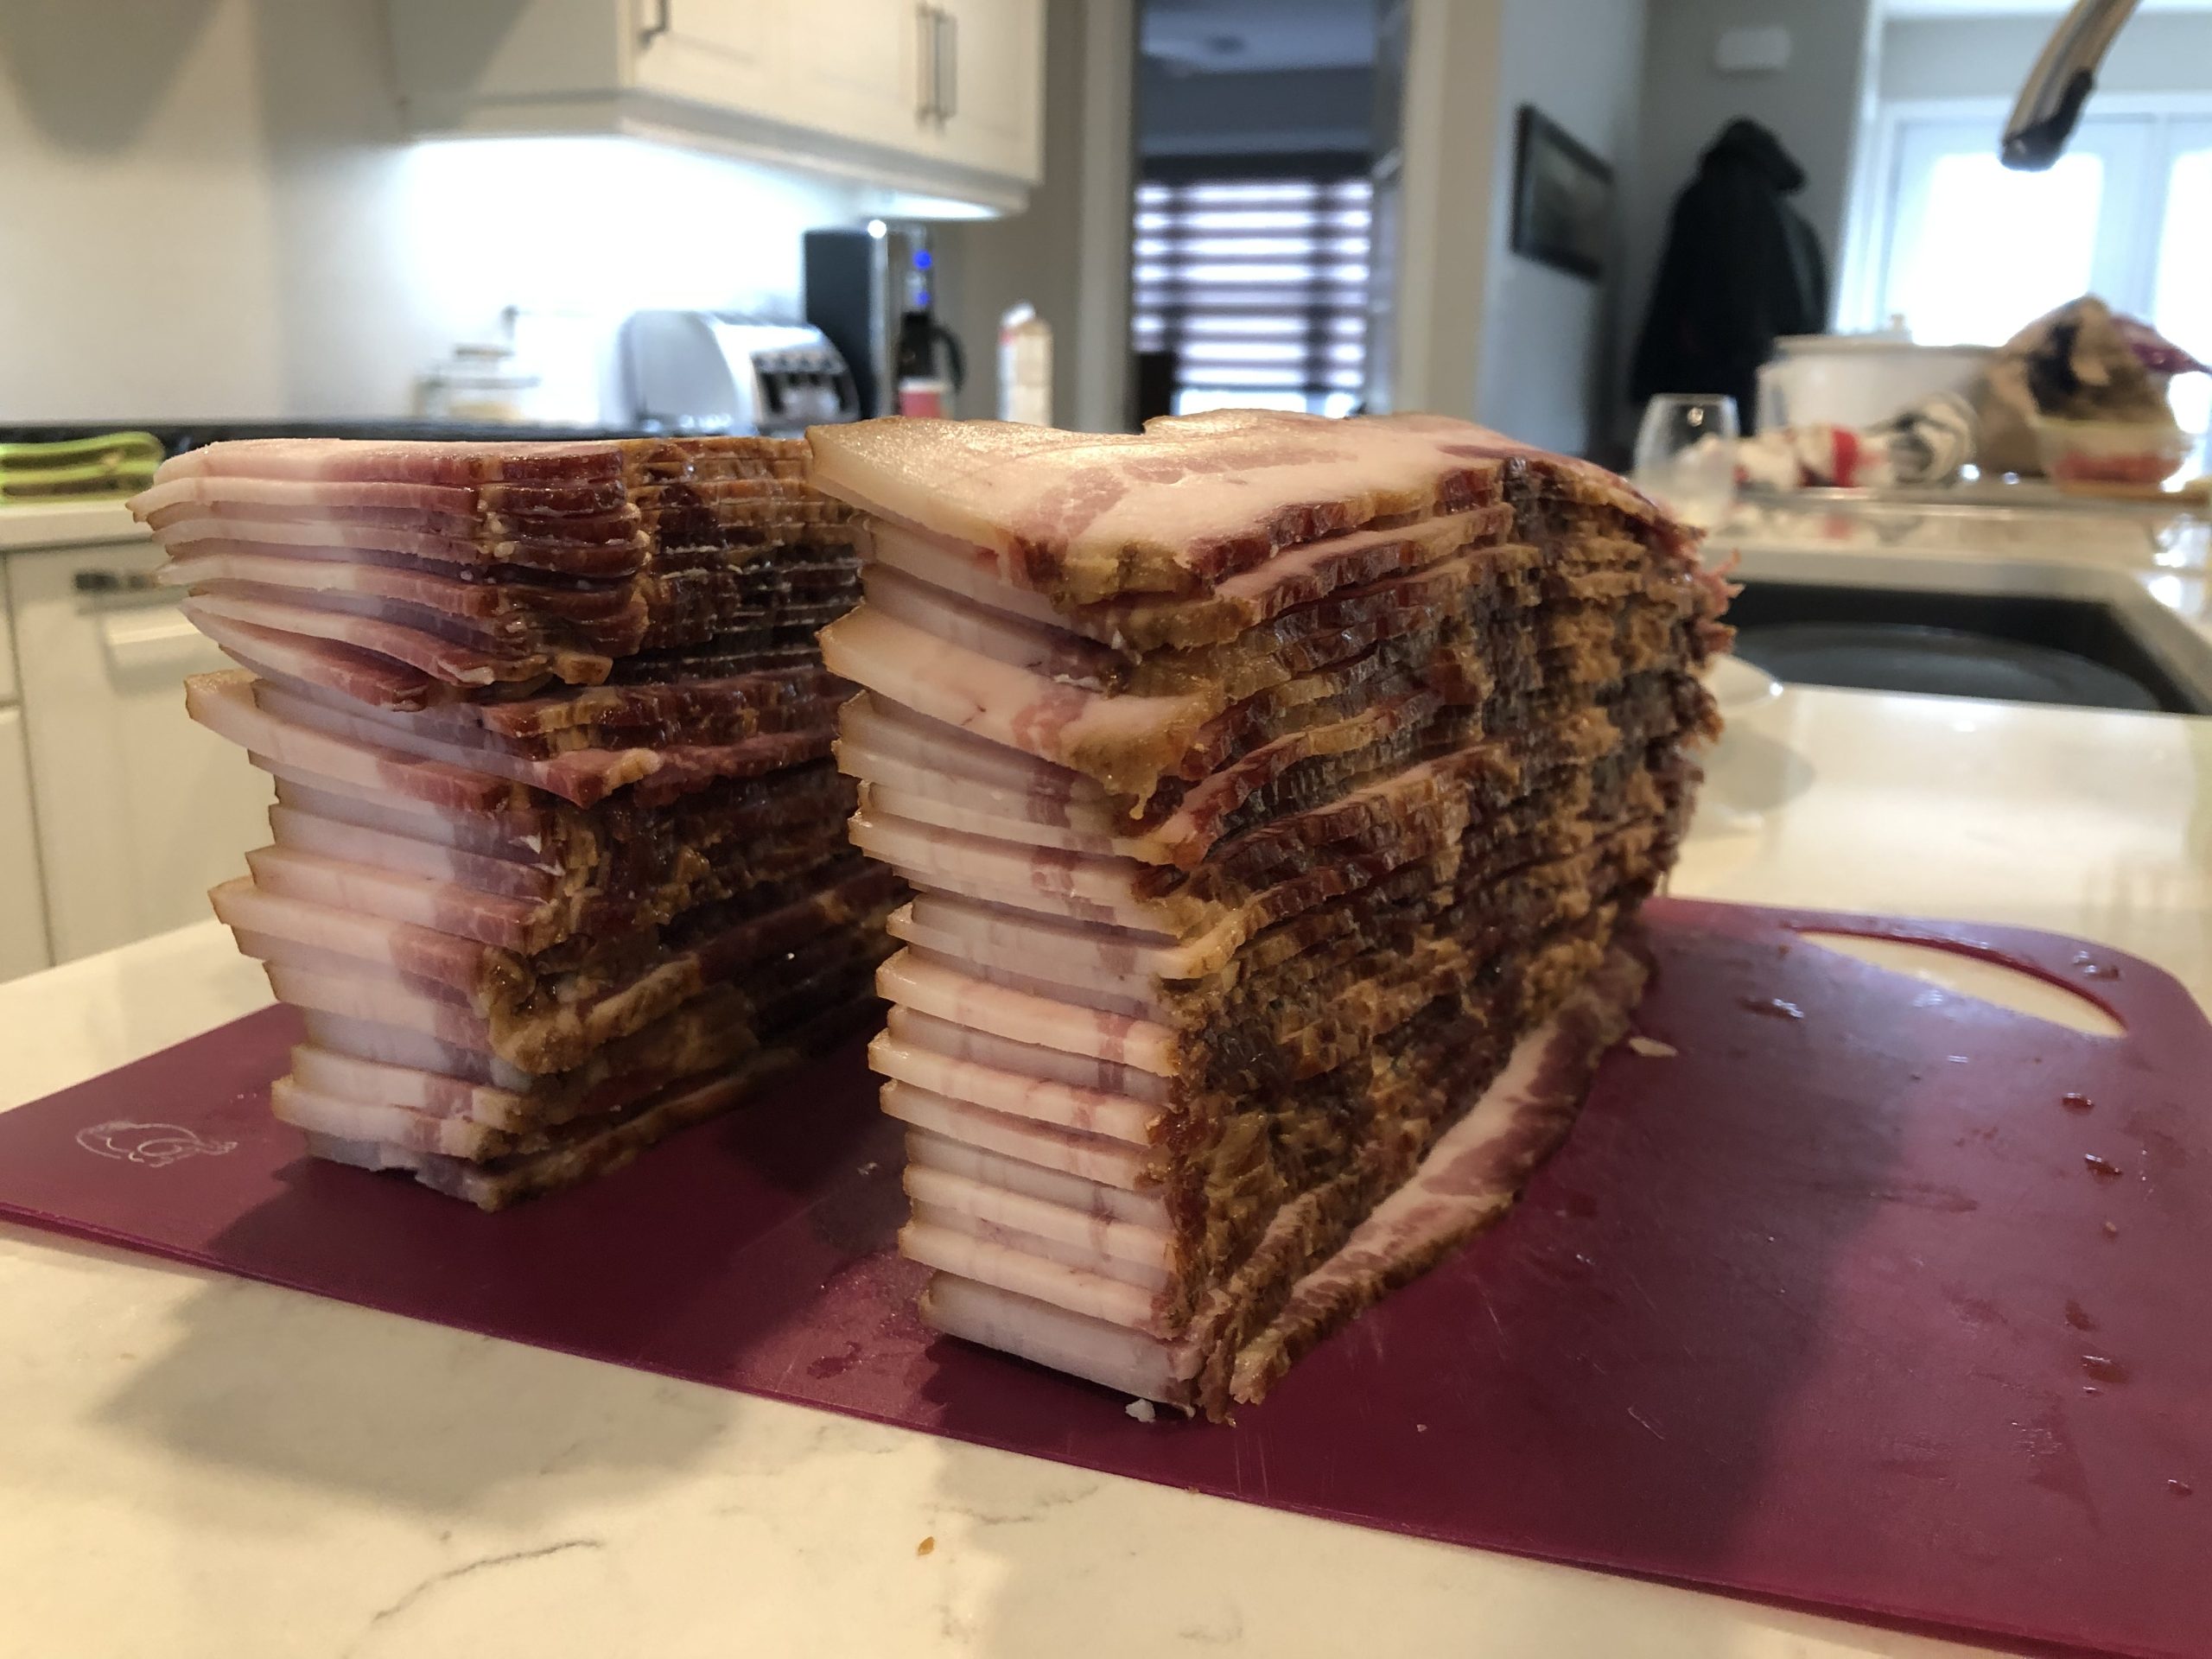
Its time to slice and package!
I take my slabs and trim the edges in the slicer to square up the slab. I then slice them keeping all the scraps separate. I will package the scraps and eat them at some point. (usually when there is no more in the freezer) lol. If you have a food saver add however many strips you want in each package. Once sealed they will last a good while in the freezer.
ENJOY! you will never buy bacon again.